
In this User Guide, we cover OAE for Project Reviewers – providing non-estimators a basic understanding of the system.
OAE is built by estimators, for estimators – but they’re not the only ones who use it. If, for instance, your role includes reviewing estimated projects, you don’t need to know how to estimate with OAE, but you still need to understand enough to use it for reviewing. So let’s review the basics of OAE for project reviewers.
Table of Contents
The Estimation Hierarchy
There are four levels to estimating in OAE. Estimation data for each one rolls up to the next higher level.
Line Item: The bulk of the work of estimation, the foundation of sorts, are line items. They are where, for instance, an estimator specifies that 80 hours of Electrician work is needed to remove existing cable, and how much that work will cost. All actual estimation data is stored in line items, and that data rolls up to each higher level of organization.
Line Item Group: Line items can be, but don’t have to be, grouped together. A gyro system replacement will need the old equipment removed before the new can be installed, so it might be useful to group the line items in Removal and Installation groups, because then you can easily see the totals for all the line items in each group.
Work Item: A bucket for all the line items for costs associated with a specific piece of work, like a gyro system replacement. Work items are often provided by the customer, like in a set of specifications for the job to be done. A work item can contain all individual line items, just line item groups, or a mix.
Projects, of course, are the top level of estimation. They contain work items.
Dashboard
The main page in OAE – for project reviewers as for estimators – is the Dashboard, which shows you all the projects in the system. By default, it will load projects currently being estimated, but you can switch to see projects that have already been submitted, as well as upcoming projects. You can also search for projects based on basic fields, taxonomies, and the project’s custom properties.
To open a project, just click on one.
Project Home
From the Dashboard, Project Home is the page you get when you open a project. Here, with OAE for project reviewers, you get a high-level estimation summary across all work items (the Project Header), the list of work items, the option to view estimation summaries by rate card, by period, and by rate card per period, and a variety of tabs that hold configuration settings, project information, and more.

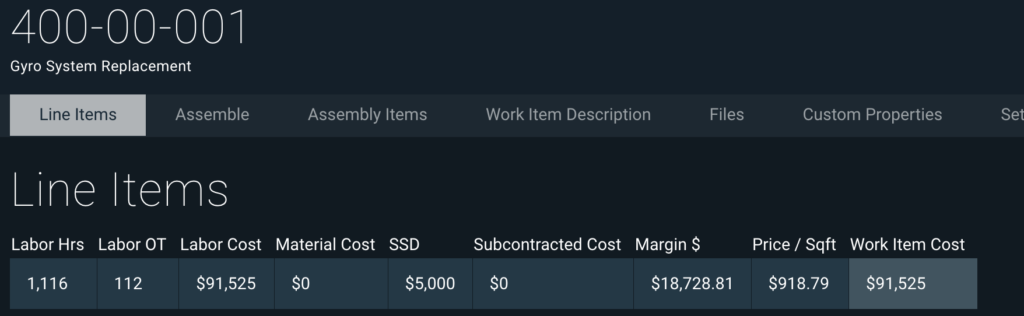
The results of Math formulas may also be set up to display in the Project Header. For the above image, Margin $ is a Math formula set to Revenue – Cost of Goods and Services, and turned on for the Project Header.
See our User Guide for Math for more information on using formulas.
Depending on the project’s configuration, you may also see some of these:
Period of Performance: Shows under Project Home page title as, e.g. PoP: 2/17/2025 - 12/12/2025.
Estimation Project Status: Shows as a colored bar on the right side, above the project’s name, showing either Upcoming, Estimating, or Submitted.
Project Description: Shows under the project’s name on the right, from the Project Summary tab, but with all formatting and line breaks removed.
The Work Items Table
Each row is a work item. The columns are configured in each project. The rightmost column is Status, which is reflected in a word and a colored corner. Work items have a simple Status-based workflow: Open –> Review –> Submitted –> Done.
Math formulas may also display as columns, if configured to do so.
Here are the ways you can interact with the work items table. The ones marked with an asterisk (*) are for estimators only because they will modify the estimate.
- Sort: Click the up/down arrow icon in a column header to sort the table by that column.
- Show/hide column groups: By default, columns that are grouped (like Labor Hours) will show one column for the group. You can expand a column group by clicking the Show Children arrow in the column header, and collapse it again using the same arrow.
- Open: Clicking on a work item row will open the page for that item.
- * Reorder: You can reorder the work items by clicking on the six dots to the left of the item’s id value, and dragging it to a new location.
The Filter and Toolbar Rows
Above the table on the right side are several options to filter the table’s rows and show a subset of the work items.
- Search filter: To see just the work items with certain text in the Estimator or Name column, type the text into the filter box.
- Flagged items: Click the flag button to see just the flagged items.
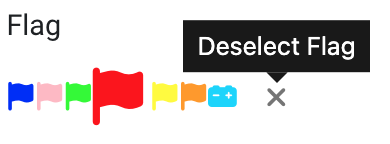
- Advanced filters: Click the filter button to see more options. This lets you add one or more logical filters using the configured work item properties, like filtering for work items by comparing two work item custom property values. The property options are pulled from the work item’s Custom Properties, except for group properties. You can also select a flag to filter on that color; to unfilter, use the X button to the right of the flags. As you add criteria, the table will dynamically update.
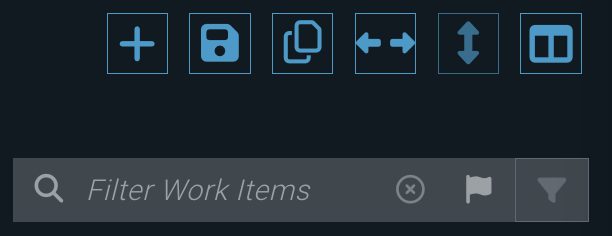
And above the filter options is the toolbar, with buttons that do a variety of things. The ones marked with an asterisk (*) are for estimators only because they will modify the estimate.
- Project Period Filter: If the project has multiple periods defined, you can choose just one of them.
- * Add Item: Manually add a work item.
- Export Project: Lets you export the work and line items to an Excel file. You can choose a file template, and filter by period, rate card, user, and flags. Note that if your project is large enough, the export feature will preserve its performance by only exporting work items unless you add a filter to reduce the data to be exported.
- * Copy Project: Creates a copy of the current project, with the option to archive the current project in the process.
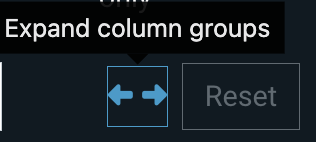
- Expand Column Groups: Use this if you want to quickly expand all column groups instead of expanding each column group individually.
- * Return to Default Order: If you’ve manually dragged work items into a different order (as described above), this will return them all to their original order.
- Filter Columns: If you want to see just some of the columns – maybe a couple of Labor Hours columns without having the rest clutter up your table – you can choose just the columns you want. You can even save a set of columns as a view you can use later.
Project Summary Tab

Depending on the project’s configuration, one or more tables will be displayed, followed by a list of any other versions of the project created by snapshot copies, and finally the project’s Description field.
- Rate Card Summary: All the project’s columns totaled by rate card.
- Period of Performance Summary: All the project’s columns totaled by period. If no periods are configured, this table is absent.
- Period Rate Card Summary: Presents the estimation totals by rate card and period. If no periods are configured, this table is absent.
- Other Versions: If anyone has created a copy of the project with the
Create Snapshotbox checked (see above), then links to any other copies appear here. Just click on one to pull up that project’s page. - Description: A rich text field you can use for any information you want. Its contents will appear in Project Home under the project’s name, but note that formatting is stripped out there, including white space.
Assembly Report Tab
The Assembly Report lets you get an overview and summary of the assembly items used across your estimate. Let’s look at the parts of the page.
Summary row

The top section of this tab shows you how many distinct assembly items are used in this estimate, along with the total cost and billing amounts.
Filters

By default, the report includes all assembly items used in the estimate. To narrow the scope of the report, use the options in the filter row.
- Work Items: Filter the assembly items used in a specific Work Item.
- Rate Cards: Filter the assembly items based on the Rate Cards associated with the line items linked to the assembly items.
- Assembly Type: Filter the assembly items based on their associated Assembly Type.
- Categories: Filter the assembly items based on their associated Category.
- Sources: Filter the assembly items based on whether they were added to the project manually or via a calculator.
- Report-only: By default, report-only assemblies are excluded. Check this box to include them in the results.
Grouping and aggregation
Once you’ve added your filters, you can adjust how the data is grouped and aggregated, and search the results.

Grouping by Assembly Item creates table rows for each assembly item, while grouping by Assembly Type creates rows for each assembly type – as configured in System Settings.

Search and buttons
The Search box will live-filter the current results using the search text, which is applied to the Name column in the Assembly Items tab. For example, even if you’re grouping by assembly type, searching for “Fastclad” will find the “Paint” type.
And off to the right of Search are two buttons.
Work Item View
In OAE, for project reviewers and estimators alike, this is where most of the estimation takes place.
The work item page looks just like Project Home, and the Line Items table works just like the Work Items table. Math formulas may also display here as columns. Key things to know:
- In the upper left, under the breadcrumbs, you’ll see the work item’s id, its name, and its period (if any).
- The line of estimate totals above the table now includes only data from the line items in this work item.
- Hit the little arrow to the left of the Name column to display the Notes for that item. If the item’s Notes already has text in it, you can just click anywhere in that row to show it.
- The rightmost part of each row is a three-dot button that lets you apply a flag to the item.
- You can edit a table cell by clicking in it and typing, unless that column is calculated, a Math column or a column group – in that case, expand the column group first.
Calculators
All line items take an input value and use the rate card to return a cost. That input value can be manual – typed in by an estimator – or it can be calculated.
Estimation involves a lot of math, and one of the ways OAE handles that for you is through Calculated Line Items, which use a formula to determine the input value for the line item. There are a wide variety of possible Calculators, from system-level ones configured by admins, to stock ones that work with the parts database or present options to select, to manual ones configured just for that line item. You can tell when a line item is using a Calculator because there’s a little calculator icon on the right side.
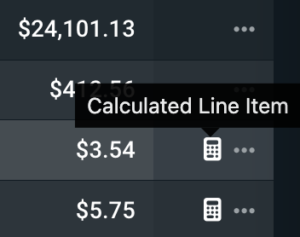
To see the math and other parameters for that Calculator, click on the three dots button and choose Open Item Calculator. But once you’re done checking the Calculator, be sure to hit Cancel to avoid inadvertently modifying the Calculator!
To learn more, see our User Guide on Calculators.
Assembly
Assembly is one of the OAE features that saves estimators time by reducing repetitive work. Assembly items are components with consistent costs per unit, like a crane that costs so much per day in gas, rental fees, etc. Once a crane is configured as an Assembly item, all the estimator has to do is provide the number of days to get the cost.
Defining the crane’s cost in one place, then plugging it in wherever it’s needed, keeps estimators from having to enter the same crane over and over, saving time and ensuring consistency.
Every Assembly item belongs to an Assembly type, which is a basic category like Equipment or Paint, or whatever system admins have configured. Assembly items are added to work items, and can show up in three different ways.
- A line item at the top named
Assembly Estimate for [Assembly type], likeAssembly Estimate for Equipment. This sort of line item contains the total out of all Assembly items for that Assembly type. - A line item named
Assembly outputs for "[line item]", likeAssembly outputs for "Underwater Hull Blast and Coat". This sort of line item is created by a Calculated Line Item that outputs a value to an Assembly item, then creates a line item with the Assembly item’s output. - One or more values in an existing line item. An Assembly item can be linked to a line item, in which case the output of the Assembly item is just placed in the appropriate columns in the linked line item
You can see the Assembly items configured for a work item by switching to the work item’s Assemble tab.
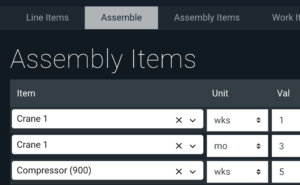
In the above screenshot, a Compressor (900) for 5 weeks and Crane 1 for 3 months and 1 week have been added. Each of those items is configured with a cost, so the system does the math and tells the estimator what the cost is to use Compressor (900) for 5 weeks.
To learn more, see our User Guide on Assembly.
OAE for Project Reviewers Introduces Pivot
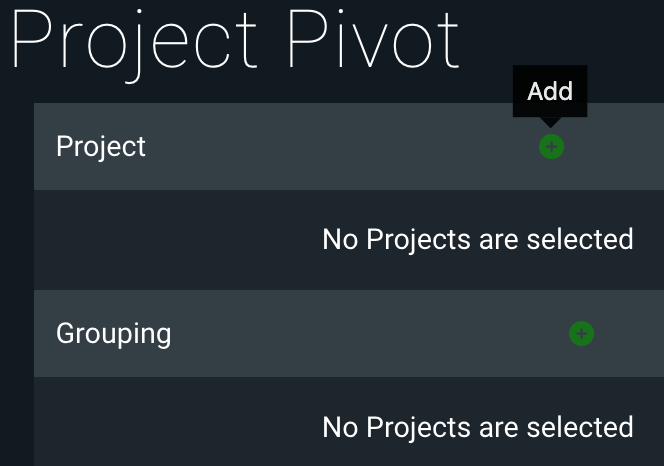
Pivot is an OAE feature that helps users analyze and understand their estimation data by creating pivot table-like overviews of one or more projects, aggregating estimation data by groupings like work item, rate card, status, and more.

Unlike everything else we’ve talked about so far, Pivot is available in the system menu in the upper left corner.
It’s simple to use. Just add one or more projects, then add one or more groupings to aggregate the project data by. Groupings can be: project, estimator, rate card, status, work item, work item custom properties.
The data will display in a table, with all the project’s columns – including any Math formulas configured for the project. The results will auto-update if any of the underlying estimate data is modified. Learn more about Pivot.
Learn More
Check out the rest of our User Guides to learn more about OAE.
