
What is it?
The OAE Assembly feature lets you define reusable standard estimating components that have consistent parameters, in a hierarchy that supports both standardization and customization.
Why do I need it?
Assembly makes estimating more efficient, more intuitive, and more consistent, reducing repetitive estimation and manual entry errors while helping to standardize estimating.
More efficient, because you have per-unit estimate values, say blasting and coating an area, where each square foot means a certain amount of labor and a certain amount of material – the ratio of labor to material is constant, so why enter it separately in each blast/coat line item? Just define it once, then when you need to add it, all you have to provide is the square footage.
More intuitive, because you can, for instance, configure each piece of rented equipment as a standard line item, then add it to the work items that need it. This reflects the way we actually think about projects.
More consistent, because the Assembly hierarchy lets you store default values for estimating components at different levels – see the following section for how that works.
The OAE Assembly Feature Hierarchy
Assembly provides an implementation hierarchy that lets you maintain standardization while allowing flexibility for nonstandard cases. Assembly items can be created at different levels, and will show up as special line items.
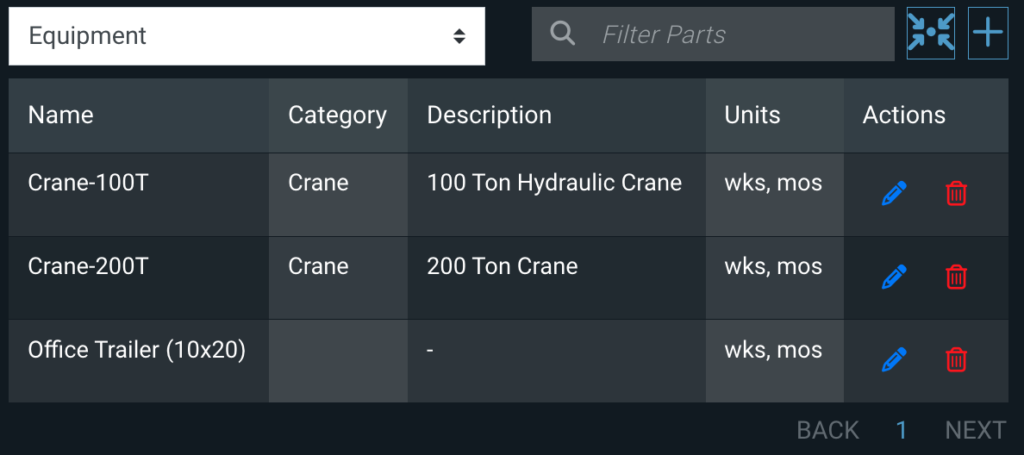
- System level: It starts here, by defining Assembly types, like Equipment, with their own default unit of measurement and properties. Then you can add system-wide Assembly items of that type – which can be used in any work item in any project.
- Project level: Here you can add any of the system-wide Assembly items and customize them for the project (called “overrides” – see below), as well as create project-level Assembly items. All those items can be used in any work item in the project – but no other projects.
- Work item level: Here you can add any of the Assembly items defined for the project, whether they’re copies from the system level or created just for the project.
We say “you can add” because the OAE Assembly feature is an opt-in system. Items defined at a higher level are available for adding at lower levels, but they aren’t automatically added.
Overrides
As noted above, at the project or work item level you can add Assembly items from the level above. When you do that, you can leave them as-is, or customize them to fit a particular case – overriding the values set at the level above.
Assembly items that you customize, whether by changing the properties, estimates, units, or all of those, are only available to the current project. An override in one project will never affect other projects. And thanks to the hierarchy, you can override a project-level override at the work item level. Here’s how the scope works with overrides.
Project level: Any override applied at this level will apply to all uses of that Assembly item in any work item, unless it also has a work item override applied.
Work item level: Any override applied at the work item level will only apply to Assembly items added to that specific work item.
Assembly Type Properties
Each Assembly type can be set up with its own custom properties. For example, an Equipment type could have properties like Size, Length, Capacity, Model, and so on. Then when you create Assembly items of the Equipment type, you can fill in those properties for each piece of equipment.
Think of an Assembly type as a template you create yourself, so that all the information about that type of item is consistently attached to the item, wherever you need it in your estimate.
Assembly items come with estimate values. Each Assembly item lets you provide, for each estimation column, the unit and cost per unit. That way, when you add one to your estimate, you just have to provide the quantity – just like rate cards work for most line items.

The OAE Assembly feature offers the following field types for custom properties: short text fields, multi-line fields, whole number fields, decimal number fields, date fields, select/dropdown fields, and even groups of properties.
Using Assembly in Your Estimate
Once Assembly types and items are configured for your system and your project, here’s how you use them to estimate.
In your list of line items, instead of adding a normal new line item, you go to the work item’s Assemble tab, choose an Assembly type and item, then provide the unit and value for the estimate. OAE shows you all the columns in your estimate while you’re assembling items, so you can make sure the estimation results are what you expected. Since the cost per unit is configured with the Assembly item, once you provide the value, the OAE Assembly feature does the math for you.
And remember, you can alter the standard configuration of an Assembly item once you’ve added it. And you can add as many Assembly items to a work item as you need.
All the Assembly items you add to a work item display as one line item for each Assembly type, so you get one estimate for, say, all the Equipment Assembly items. Or, if you want, you can link an Assembly item directly to an existing line item, and the Assembly item’s costs will be put in the existing line item’s columns; note that doing this locks that line item so it cannot be manually edited. Assembly items can also be used in special Calculated Line Items, where they output their results as input to an Assembly item, which then creates a special line item for the Assembly outputs.
Integration with Calculators
Assembly items can enhance another OAE feature, Calculators, by using an Assembly item’s properties. A Preset Calculator can take a defined set of user inputs, pull in the Assembly item’s properties, and perform math on it all to produce one or more estimate values. System admins can configure Preset Calculators to either output a line item, or – since Assembly Items take input – feed the result into the Assembly item and add a line item named Assembly output for <line item name>.
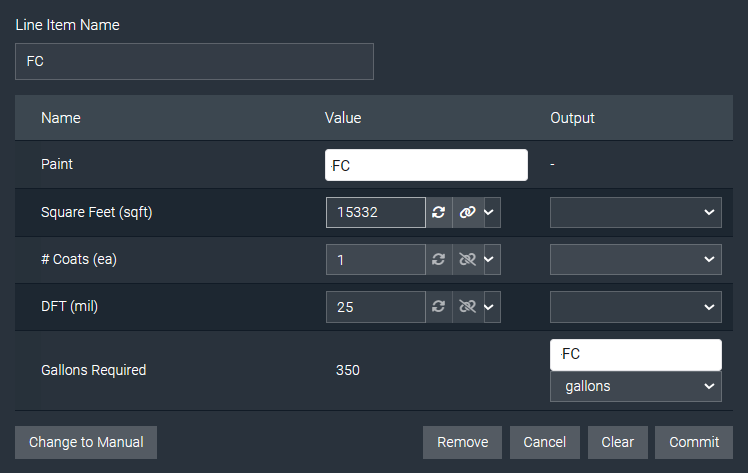
What does that mean? Consider painting, which has both material and labor costs that are predictable.
If you know the square footage of the area, the number of coats, and the type of paint (and other factors, but you get the point) then the math to determine the volume of paint and labor hours is the same every time. You can define Paint as an Assembly type, and each type of paint as an Assembly item with all that paint’s properties. Then when the Calculator gets type of paint, square footage, and number of coats, it can output estimate values for material and labor.
Here’s what that might look like when you create the Calculated line item.
Get OAE Today
If you’re already using OAE, you get the OAE Assembly feature automatically. If you aren’t using OAE yet, contact us today to get started.
