In this User Guide, we’ll cover using the OAE Assembly functionality to more efficiently build your estimates using standard “building blocks” that have been defined by administrators.
Table of Contents
Overview
The OAE Assembly functionality provides estimators a more efficient way to build their estimates using known quantities per unit of work. Rather than building estimates manually using Line Items and directly entering values, estimators often have defined “building blocks” for building their estimates.
Examples include the number of hours and equipment costs for setup and breakdown of scaffolding, where the estimator just needs to know how many times they need to do it. Another example may be the number of hours required to blast and coat an area per square foot, where the estimator just needs to know how many square feet the space is.
Assembly Items offer flexible units, which has advantages over preset calculators in certain scenarios, such as rental equipment that may be rented over weeks or months.
While there is overlap between Calculators and Assembly, and either capability may solve your need, there are advantages to using Assembly or Calculators depending on your need.
Assembly Item Configuration
Assembly Types define the different types of Assembly Items that can be created, and each Assembly Item is created as a specific Assembly Type.
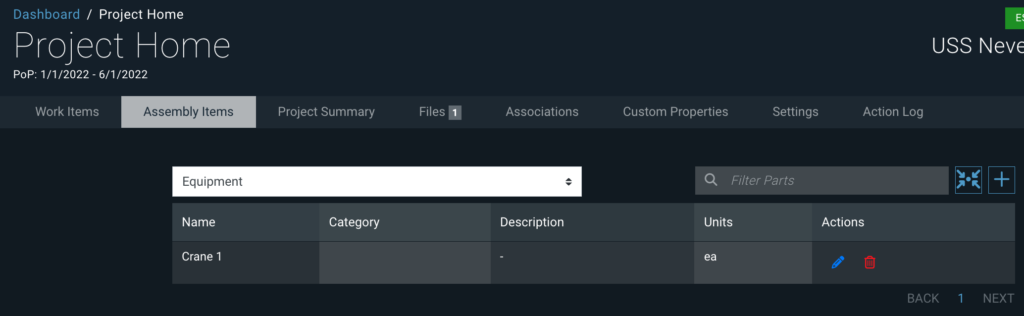
Once an admin has configured Assembly Types you can add Assembly Items in that tab in Project Home.
Assembly Items represent the actual building blocks that estimators use to build their estimates. The specific properties, units, and estimate values for the Assembly Item are entered within the Assembly Item settings.
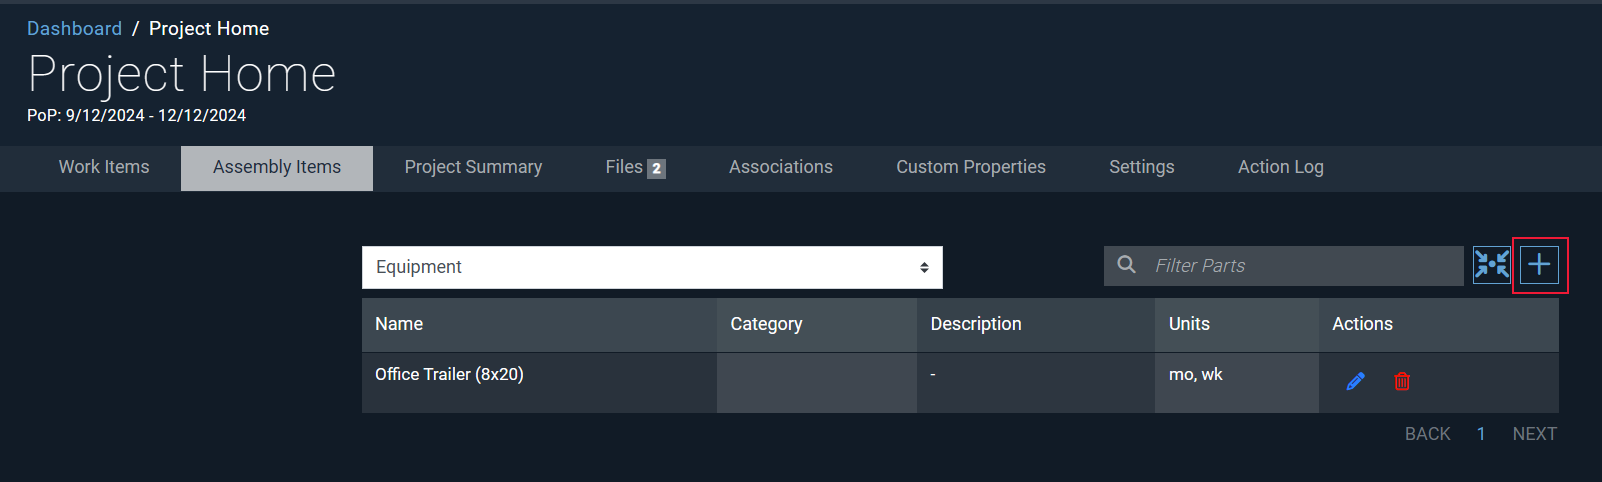
When creating or editing Assembly Items, select the Assembly Type of the Assembly Item by clicking in the white box above the Name and Category columns.
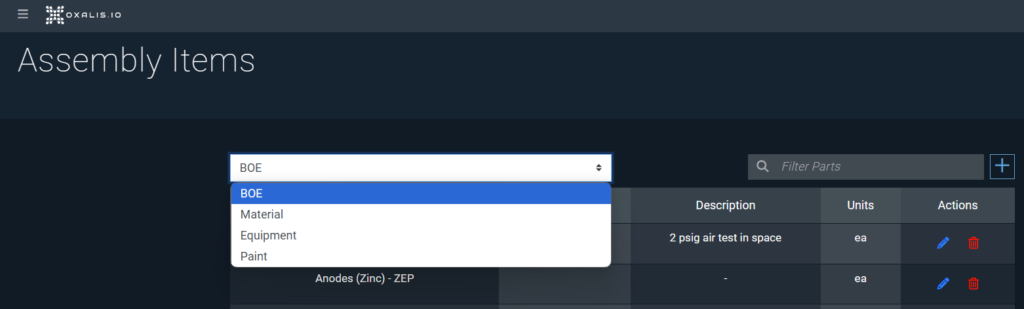
Choosing the Assembly Type will load the list of Assembly Items for that Type. You can also use the Filter box in the top right to filter the list by the Name field.
- To create a new Assembly Item within the selected Assembly Type, click the blue + sign in the top right.
- To edit an existing Assembly Item’s properties or estimate values, click the blue pencil icon on the relevant row in the Assembly Item table.
- To delete an Assembly Item, click the red trash can on the relevant row in the Assembly Item table.
The Add Item window for creating a new Assembly Item and the Edit Item window for editing an existing one have the same fields. Here you can set the properties, units, and estimate values for the Assembly Item.
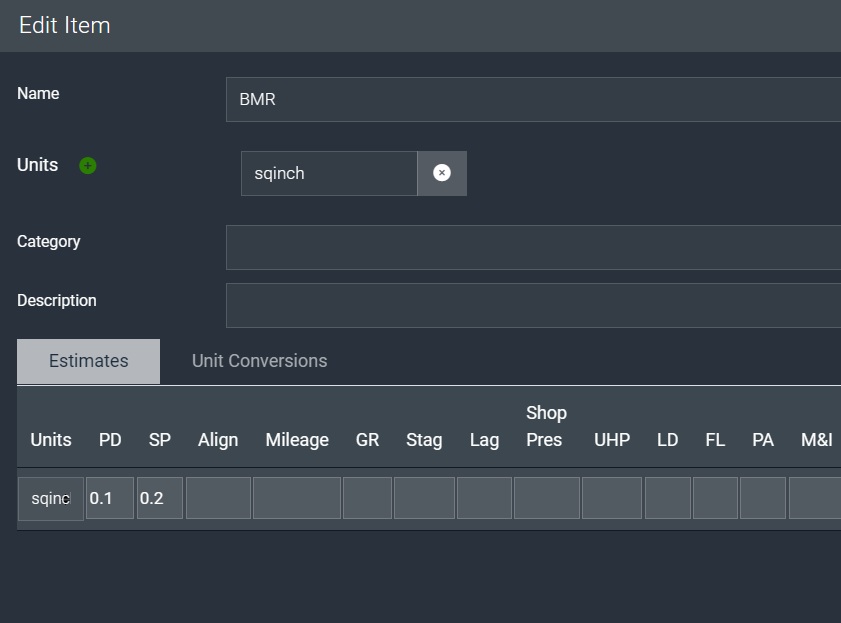
- Name: Name your Assembly Item.
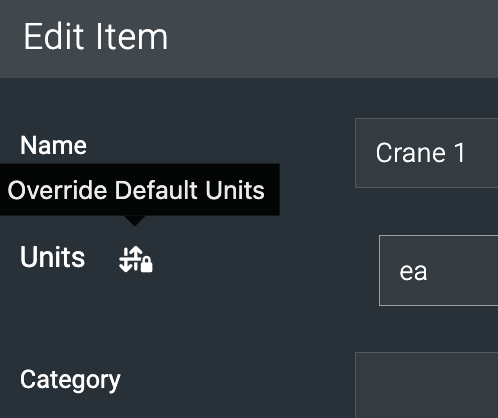
- Units: Define the different units your estimators need to be able to estimate the assembly item in terms of.
- New items will prepopulate the default unit configured in that Assembly Type. To change the unit, click the icon next to the “Units” field label; you will then be able to change the unit.
- New items will prepopulate the default unit configured in that Assembly Type. To change the unit, click the icon next to the “Units” field label; you will then be able to change the unit.
- Category: Enter the category of the Assembly Item. This will let you group similar Assembly Items together.
- Description: Enter a short description of the Assembly Item for estimators to reference.
Estimates
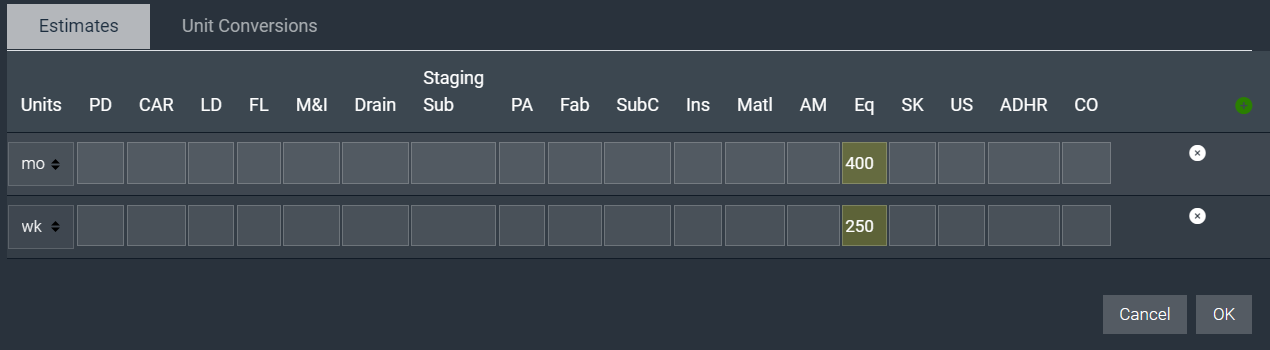
The Estimates tab in an Assembly Item defines the value for the Assembly Item per unit. Each column defined in your Structure will appear as a column in the Assembly Item, allowing you to enter an estimate value in the Assembly Item. A row for each unit defined in the Assembly Item will appear.

In the above example, the Assembly Item has two units defined: Months and Weeks. An equipment cost has been defined per month and per week.
When an estimator uses the above Assembly Item, they will have the option to enter the number of months or weeks they need the equipment for, and the system will calculate the Equipment Cost for that Assembly Item based on the number and selected unit.
Unit Conversions
The Units Conversions tab in an Assembly Item allows users to define how the defined units can be converted between each other.

In the above example, the Unit Conversions tab is used to define how the system should convert weeks to months + weeks. $v represents the number entered by the estimator. If an estimator chooses to use an Assembly Item and knows they need to rent the equipment for 6 weeks, the system can calculate the number of weeks entered in terms of months + weeks. The months will equal the number of weeks divided by 4, rounded down. The number of weeks equals the remainder of the number of weeks entered divided by 4, rounded up. Note that you can use functions (like floor and ceil above) from math.js.
Assembly Item Hierarchy
OAE Assembly Items leverage a hierarchal structure that makes it easy to create and manage Assembly Items for estimators to use. The hierarchy includes:
- System-wide Assembly Items
- Project Assembly Items and Overrides
- Work Item Assembly Items and Overrides
Assembly Items defined at the System level can be used in any Work Item in any project. There may be scenarios where the Assembly Items need to be overwritten at the project or individual Work Item levels. For example, the TAOs for a particular Work Item may be more complex than typical so that estimators need to increase the per-TAO hour estimate. OAE Assembly supports the flexibility required to configure the project or Work Item level overrides.
Assembly Item Overrides
Within a project or Work Item, estimators can override existing Assembly Items and create new Assembly Items.
Project and Work Item Assembly Item Overrides
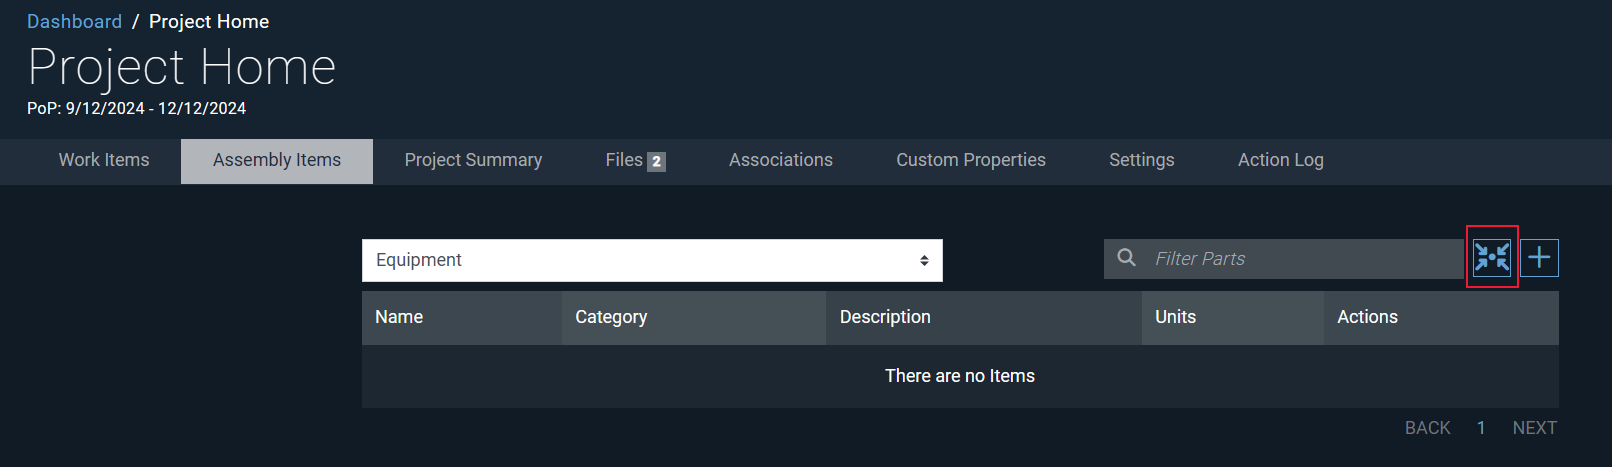
- On the Assembly Items tab of the project or Work Item, select the Assembly Type of the Assembly Item you need to override, and click the center arrow icon to pull up the Assembly Item selector.
- Choose the Assembly Item you need to override from the dropdown.
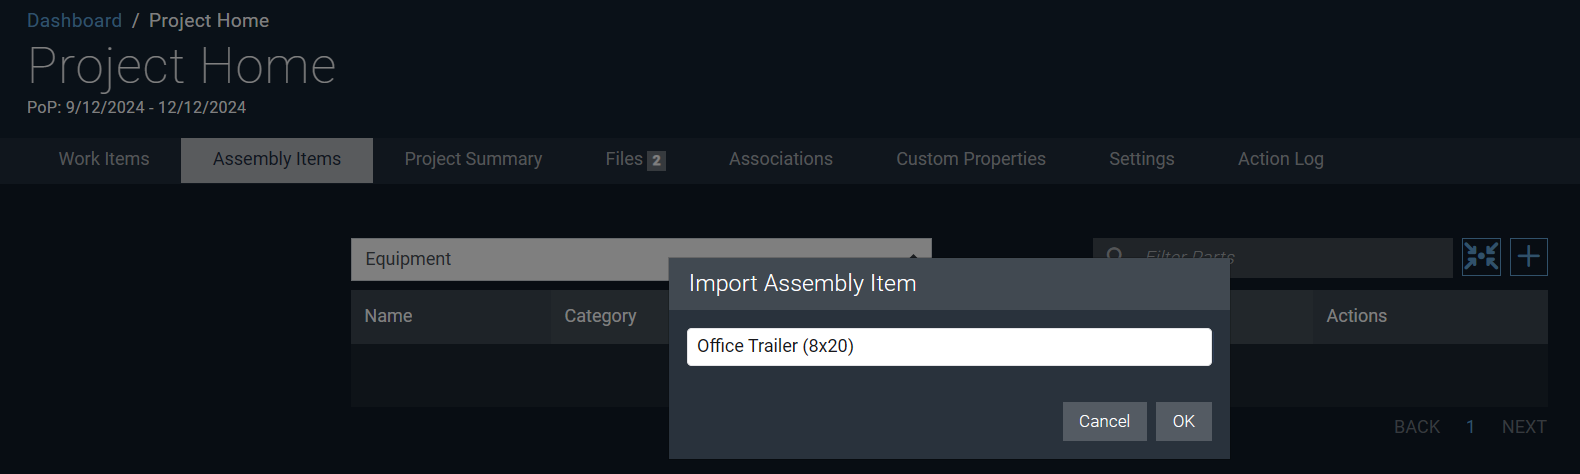
- Click OK.
- Once the Assembly Item has been added to the list, click the blue pencil icon to edit its settings. Estimators can edit any component of the Assembly Item configuration, including its properties, estimates, and units.
- Any override applied at the project level will apply to all uses of that Assembly Item in any Work Item, unless the same Assembly Item has a Work Item specific override applied.
- Any override applied at the Work Item level will only apply to Assembly’s added to that specific Work Item.
- Project and Work Item level Assembly Item overrides have no impact on the Assembly Items used in any other project.
- Any Assembly Item or Work Item override applied at the project or Work Item level will be highlighted in yellow, indicating to the user that the value has changed from the system level Assembly Item configuration or project level Assembly Item override.
Create New Project or Work Item Assembly Items
- On the Assembly Items tab in a project or Work Item, select the Assembly Type you need to create a new Assembly Item for.
- Click the blue + sign on the top right of the Assembly Item table.
- The Add Item screen will appear and allow you to create the new Assembly Item, the same way administrators can in the system-wide Assembly Items configuration.
- New Assembly Items created at the project level are only available to be used within that specific project.
- New Assembly Items created at the Work Item level are only available to be used within that specific work item.
- New Assembly Items created at the project or Work Item level will not be available for users to use in any other project.
Using OAE Assembly Items
- To use an Assembly Item to build the estimate for a Work Item, go to the Assemble tab in the Work Item page.
- Select the Assembly Type of the Assembly Item you need to add, using the Assembly Type dropdown in the top right of the Assembly Items table.

- Choose the Assembly Item you need to use in the Item dropdown. Users can type in the selection dropdown to find the Assembly Item needed, rather than scrolling to find the Assembly Item.
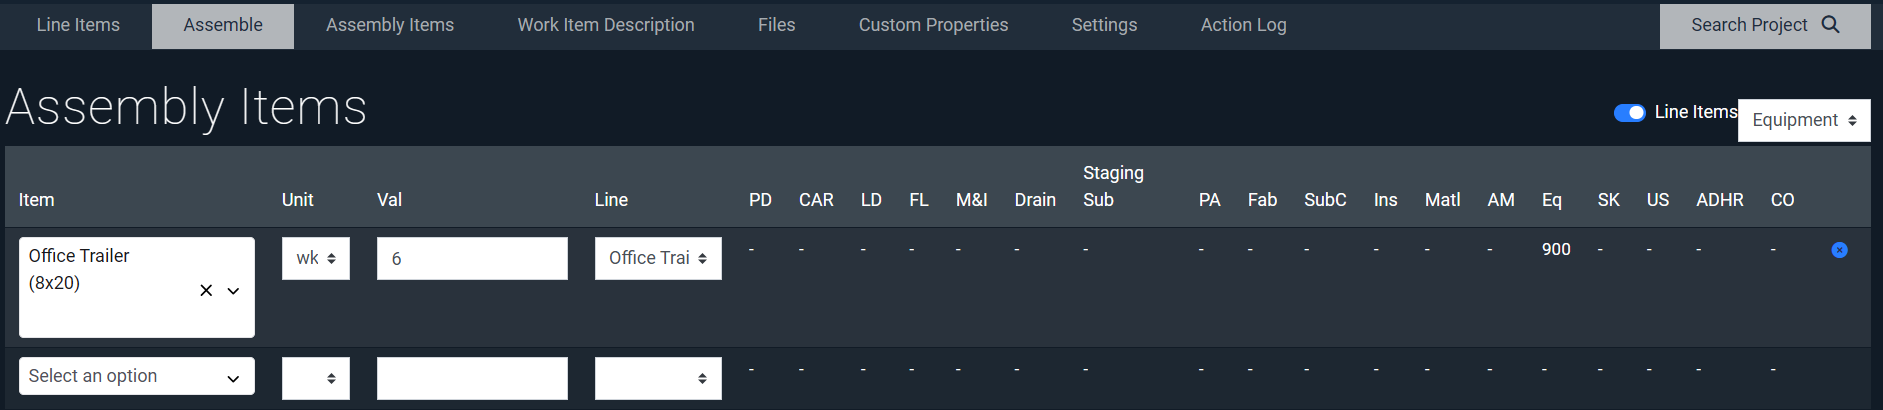
- Once the Assembly Item is selected, select the unit you will be using to estimate.
- In the Val column, enter how many units you need for that Assembly Item. For example, if an 8×20 Office Trailer is needed for 6 weeks, the Assembly Item might look like this:

- Estimators can add as many Assembly Items as needed to a Work Item.
- By default, OAE Assembly will add a single Line Item for each Assembly Type that has Assemblies applied to that Work Item. The estimate values added for that Line Item will include all the Assembly Items applied for that Assembly Type in the Work Item. The naming convention of the Line Item added that will be “Assembly Item for [Assembly Type Name].”

In addition to (by default) having “Assembly” in the Name field, items based on Assemblies get a special icon next to the three dots.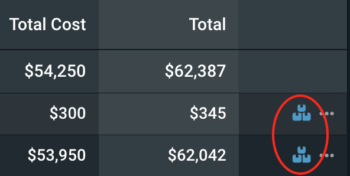
Linking Assembly Item to Line Items
OAE Assembly allows estimators to link Assembly Item estimates to existing Line Items, rather than applying the estimates through the auto-generated Line Item. This makes it easier to review your estimate and have a better understanding of how the estimate for the Work Item was built.
- Toggle the Line Items toggle to enable Assembly Item to Line Item linking. This will add a new column called Line, that allows Estimators to associate the Assembly Item to an existing Line Item.
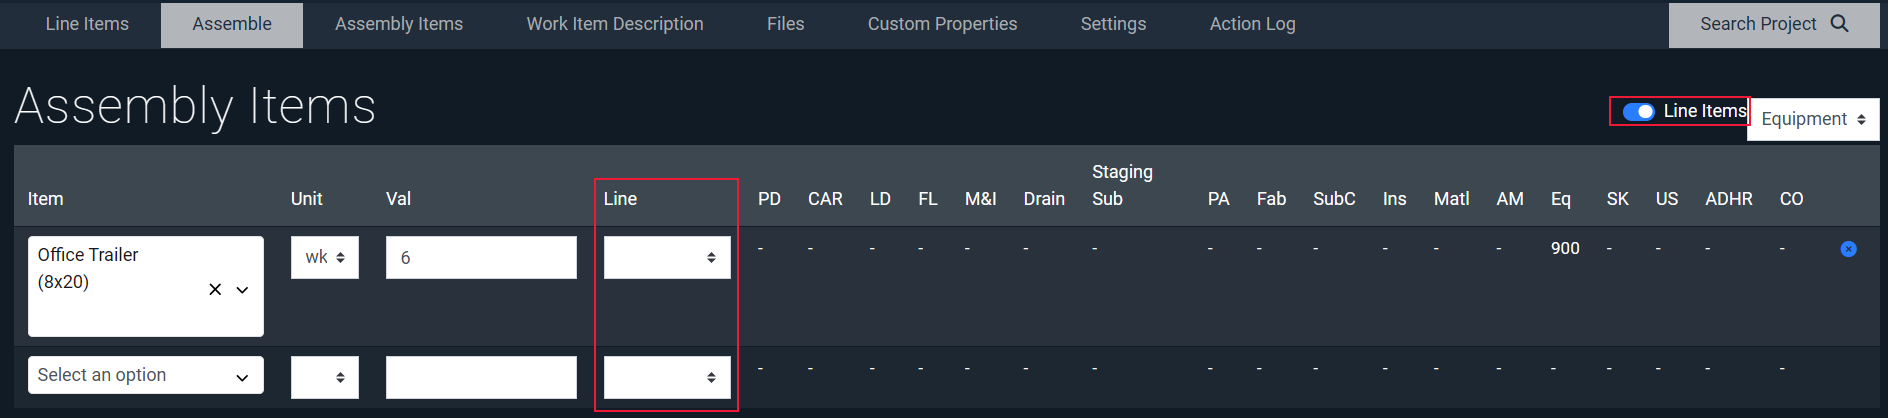
- All existing Line Items in the Work Item will appear in the Line dropdown list available for Estimators to select.
- The estimate values for any Assembly Item that is linked to a Line Item will be included in that Line Item, rather than the auto-generated Line Item for that Work Item.
For example, in the above screenshot we set Line to the Office Trailer. Now when we look at the Line Items, the $900 of equipment costs from the Office Trailer (8×20) Assembly is now included in the existing Office Trailer Line Item, instead of creating an Assembly Estimate for Equipment auto-generated Line Item (that Line Item would still be created if other equipment Assemblies were configured).
Learn More
Check out the rest of our User Guides to learn more about OAE.
