
In this User Guide, we cover OAE calculators – including how to use the different types and work with math formulas.
Table of Contents
Types of OAE Calculators
Here are the various types of OAE Calculators:
- Preset – Preset equations are created and managed by a system Administrator
- Manual – Users can enter their own formulas to calculate their estimates and show their work.
- Tabular – Unit/quantity type calculations
- Selection – Users can document several options for an estimate, and select one they would like to use. Commonly used for capturing multiple subcontractor quotes and selecting which one will be used.
- Multiplier – Copy the total values of another Work Item within the same estimate with the option to scale the values.
- Parts – Leverage the parts database to calculate the total cost of materials. Using this Calculator requires use of the parts database, which can either be manually updated directly in OAE or synced from your organization’s source of truth via an integration.
Adding a Calculated Line Item
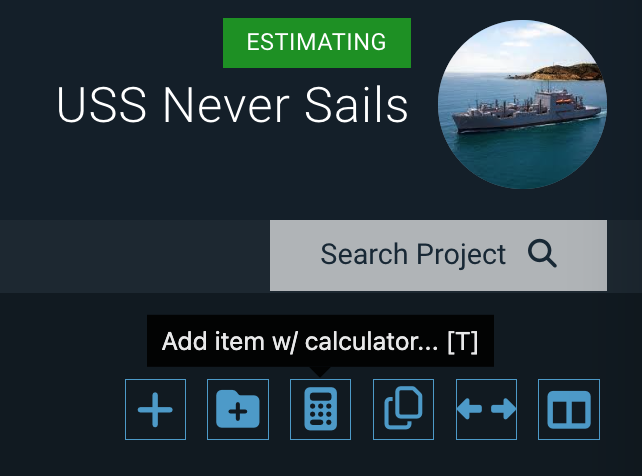
To add a Line Item with a Preset Calculator to a Work Item, you can pull up the Add Calculated Line Item window two ways. Start at the project’s Line Items tab, then either:
- Use keyboard shortcut T.
- Click the calculator icon at the top right of the Line Item.
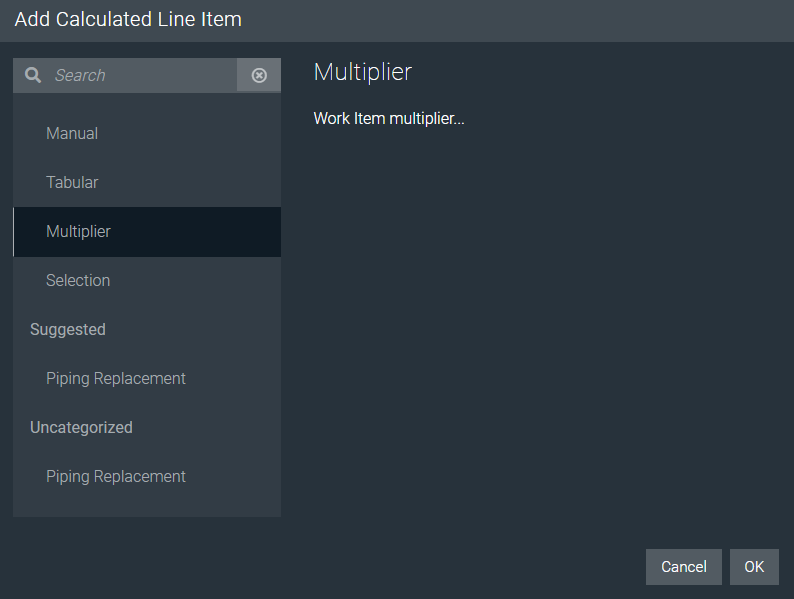
The next step is to choose a Calculator from the options on the left. Manual is the default. You can either scroll through the list of available Calculators to select from, or type in the search bar to find related OAE Calculators.
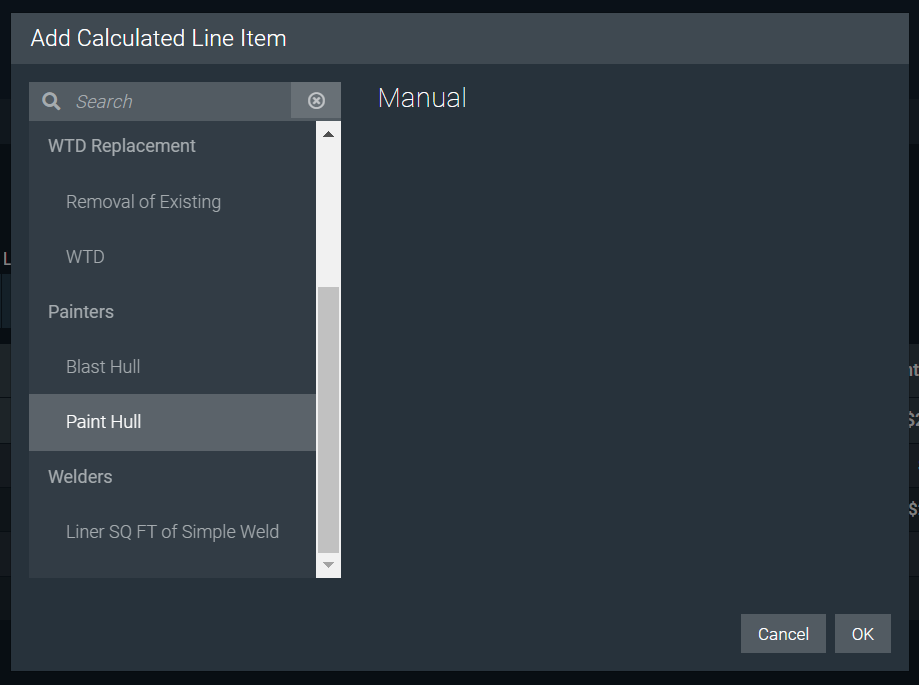
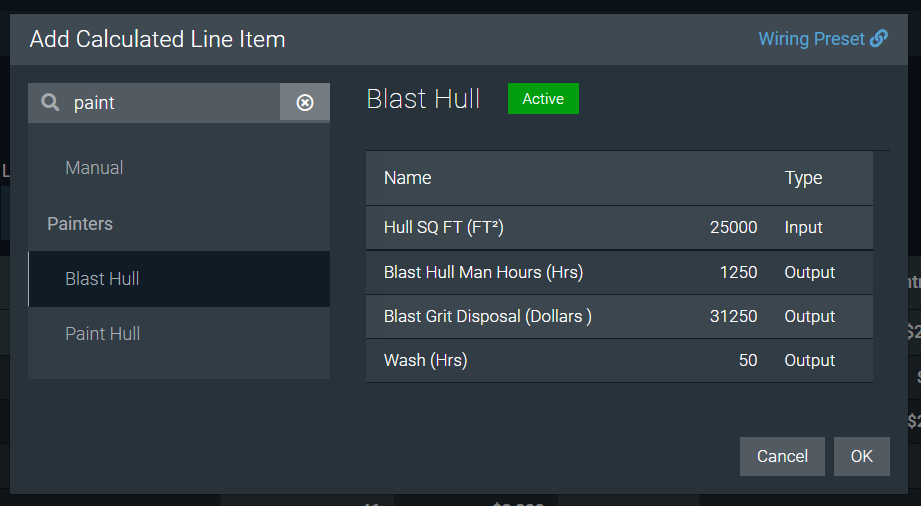
When you click on a Calculator option, it will preview the equation details before you choose to use that Calculator. Once you have found the Calculator you want to use, click OK.
If neither scrolling nor searching finds you the Calculator you want, use the Manual option to create your own – see the Manual Calculator section below.
Preset Calculator
Once you select a Calculator, fill out the Calculator details for your Line Item.
- Enter the Name of the Line Item.
- Fill in the values for each parameter in the Calculator. If the project is associated with Taxonomies or there are project or Work Item properties, you will have the option to pull property values, such as Hull Sqft, from the taxonomy into the Calculator using the dropdown next to the value. You can also pull in values from project properties.
- Verify that the proper Output column(s) are selected for the values you want to enter in the estimate.
- Once your Calculator is filled out, click Commit to create the Line Item.
Using Assembly Items with Preset OAE Calculators
Assembly Items can be used as input to OAE Calculators to use an Item’s associated properties to calculate an estimate value, or a value to be used as an input for Assembly Items.
In the example below, a Calculator is used to calculate the number of gallons needed for a specific type of paint. The Calculator uses properties stored in the Assembly Item to calculate the number of gallons, then uses the calculated number of gallons to calculate the total cost of the paint, based on the estimate configured within the Assembly Item.
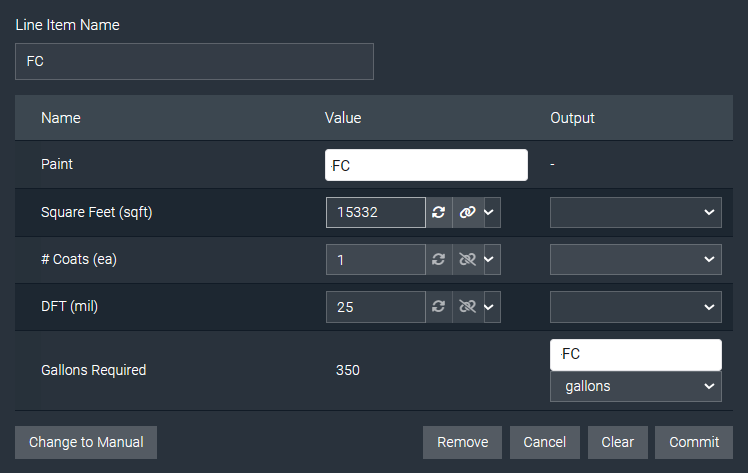
When an Assembly Output row type is used in the calculator, a new Line Item will be added to the Work Item called “Assembly output for <line item name>”. The selected Assembly Item will be added to the Assemble tab with the calculated Val from the calculator, and be linked to the system-created Line Item.
Using Properties with Preset OAE Calculators
Rather than manually typing in all input values, estimators can reference relevant property values, including:
- Properties from linked Taxonomies
- Project Properties
- Work Item Properties
Number and integer type properties defined in any of the above-mentioned components will be available for estimators to reference in Calculators.
While entering inputs in preset OAE Calculators, use the dropdown arrow in the input field to pull in the appropriate value.
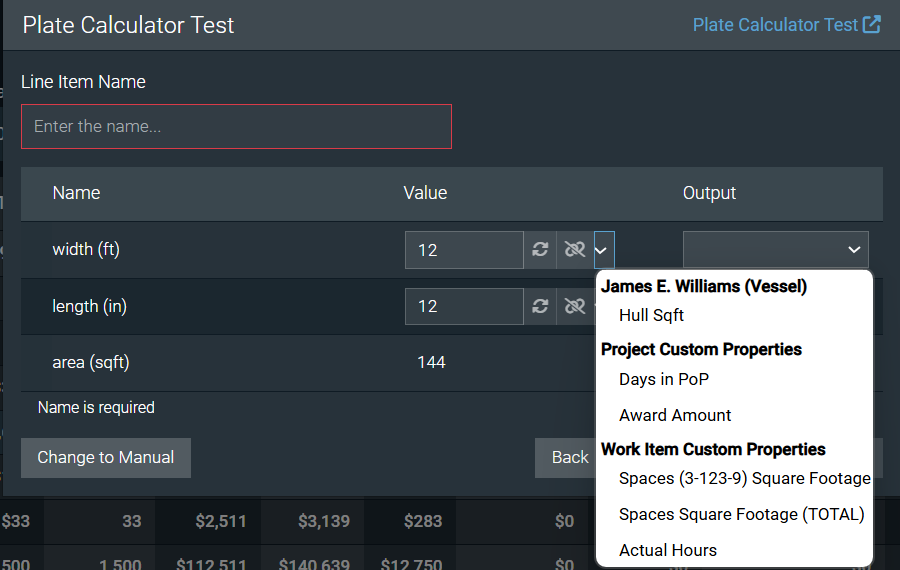
Group properties allow estimators to reference the aggregate values of the group, or the values from the individual items within the group.
Example: If you have a Group type property to track the different spaces, including their square footage, for a work item, estimators can reference the individual square footage values AND the total square footage of all spaces within the group property.
When a property value is associated with a calculator input, the link is stored and two additional icons are enabled:

- The refresh icon is used to update the value used in the Calculator input if the property value has changed.
- The chain icon is used to unlink the Calculator input from the property.
Re-Run Calculations
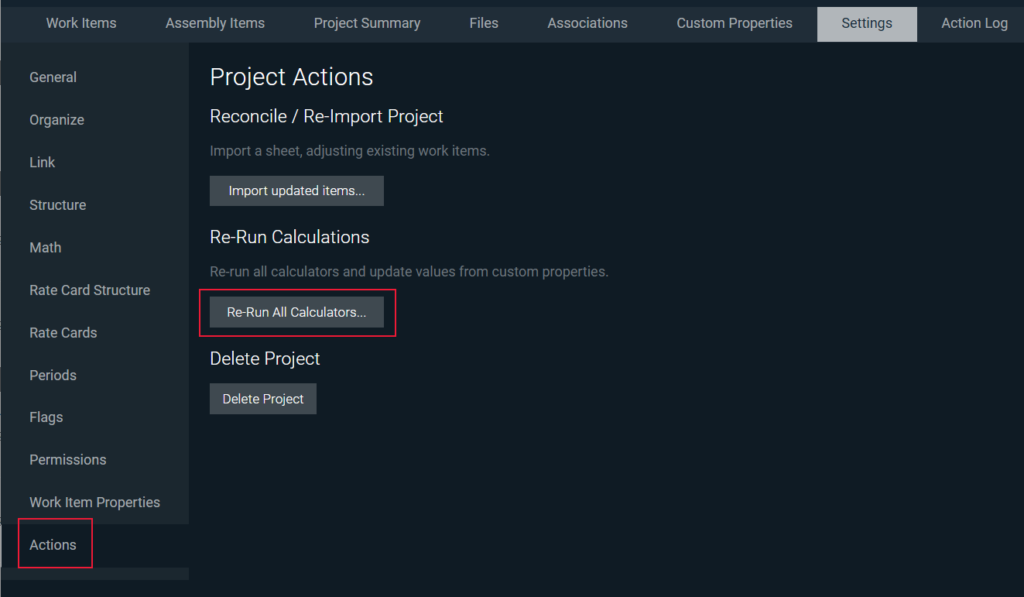
When linked values change, instead of having to refresh the Calculator inputs individually in every Calculator that exists in a project, there is also the option to refresh all calculations.
To do this, navigate to the Actions tab in Project Settings. From there, there is a button to Re-Run All Calculators.
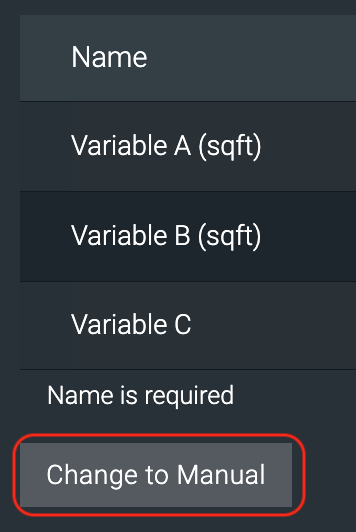
Change to Manual
When interacting with a Preset Calculator (either creating or editing) you have the option to Change to Manual which will convert the Preset Calculator to a Manual Calculator, including all of the Equation rows, Values and Outputs.
Manual Calculators
Here’s how to add a Manual Calculator.
Enter the Line Item Name.
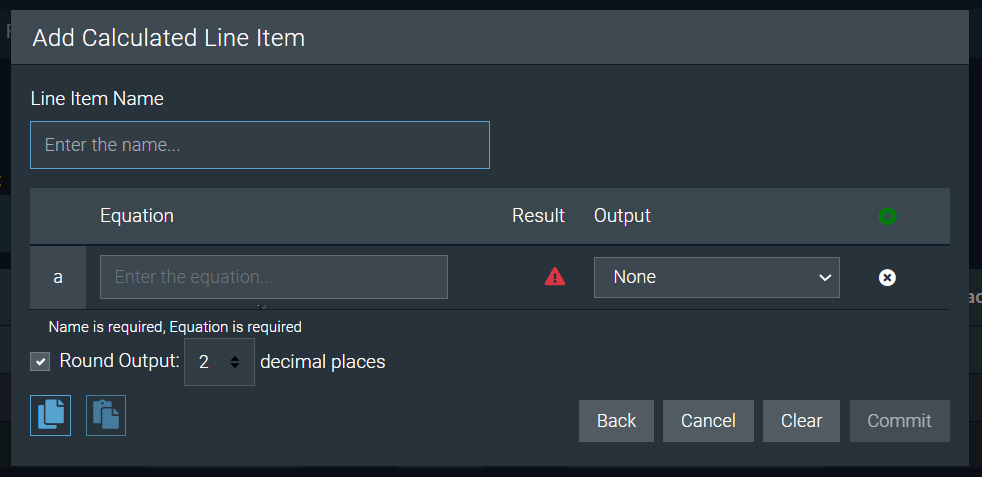
- Enter in the Equations. Every Calculator is made up of one or more Equations.
- You can add additional Equation rows with the Add new Equation button. The Result column will show a red error triangle if your equation returns an error.
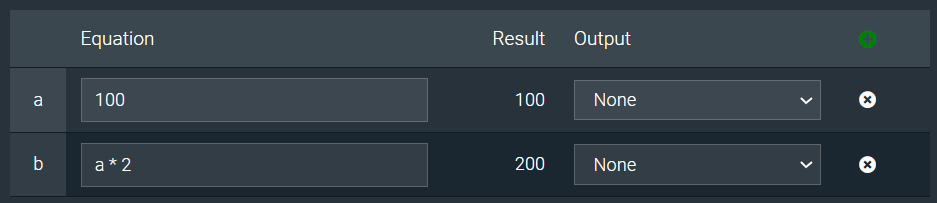
- Equations can use common (and many advanced) math functions and you can use the results from one equation in another by using the variable of the row. See below for more on that.


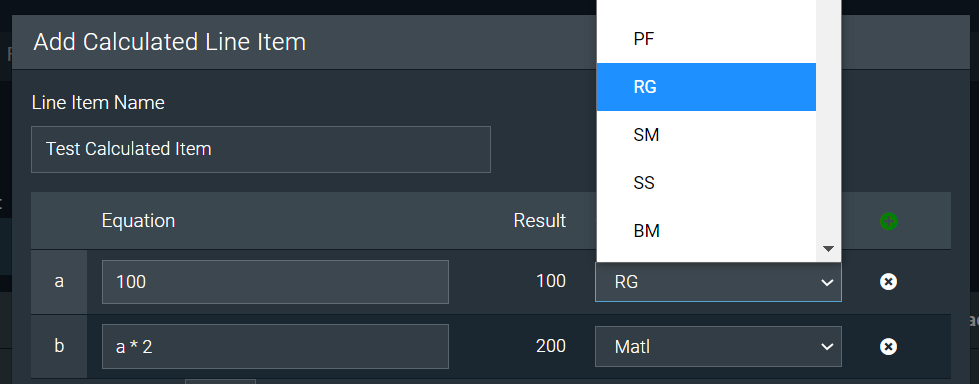
- Every equation that has a Result can be sent to any column in the Line Item by selecting it from the Output list. In this case, the Result of equation ‘a’ will go to Rigger hours and ‘b’ to Material $.

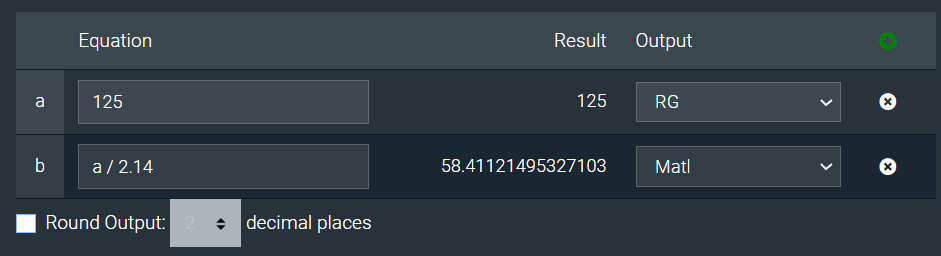
- By default, the Output will be rounded to 2 decimal places. You can choose to NOT round the Output by unchecking the box next to Round Output. You can also select how many decimal places of rounding you want by clicking on the dropdown.

- Once your Calculator is filled out, click Commit to create the Line Item.
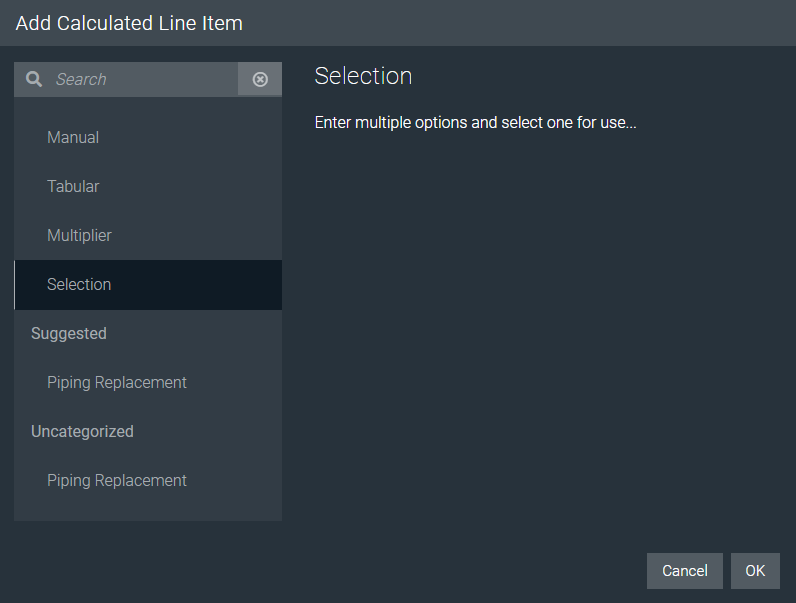
Selection Calculator
To add a line with a Selection Calculator, choose Selection in the Calculator list, then hit OK:
In the next window, add a Line Item Name and select which Section you will be selecting for. Most commonly, the Subcontracted group is selected. Once a Section is selected, the relevant columns will appear in the Calculator.

Add as many rows as needed to document all the relevant options you will be choosing from. Fill out the details, and use the radio button on the left side of the row to select which option you are choosing.
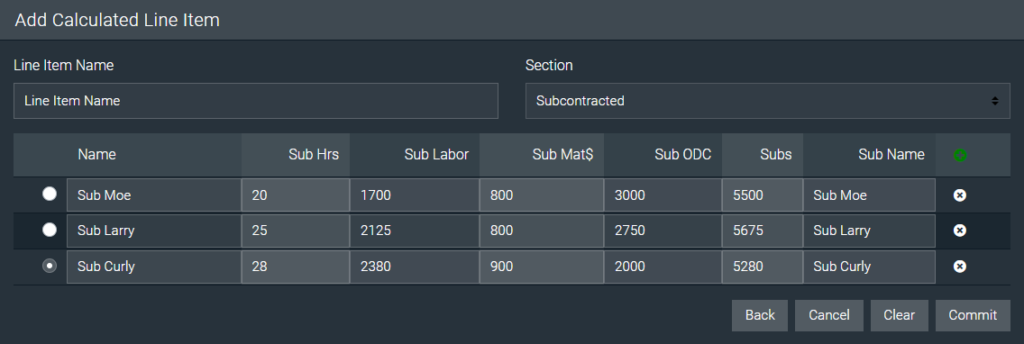
To save your selection, click Commit. This will populate the estimate with your chosen option. If you need to review or change options, simply reopen the Calculator and select a different row.
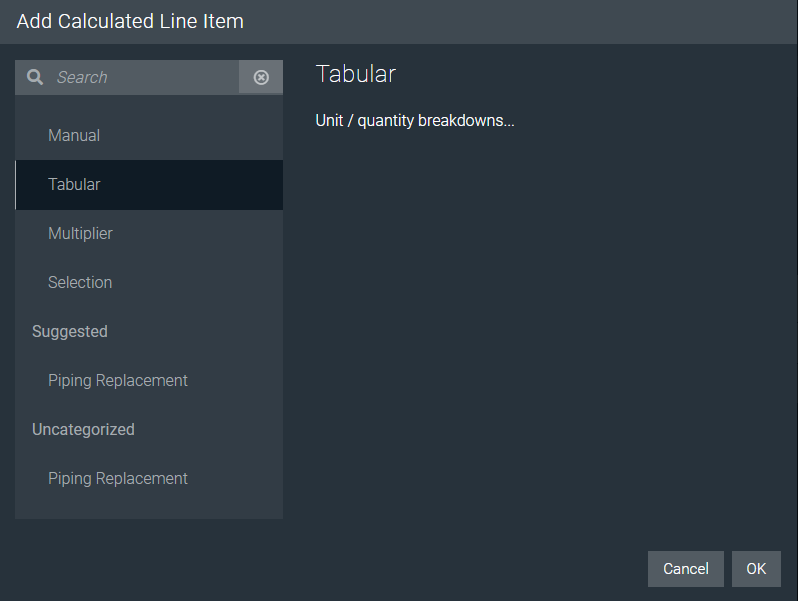
Tabular Calculator
To add a line with a Selection Calculator, choose Tabular in the Calculator list, then hit OK:
In the next window, enter the Line Item Name, and add your first row to the Calculator.
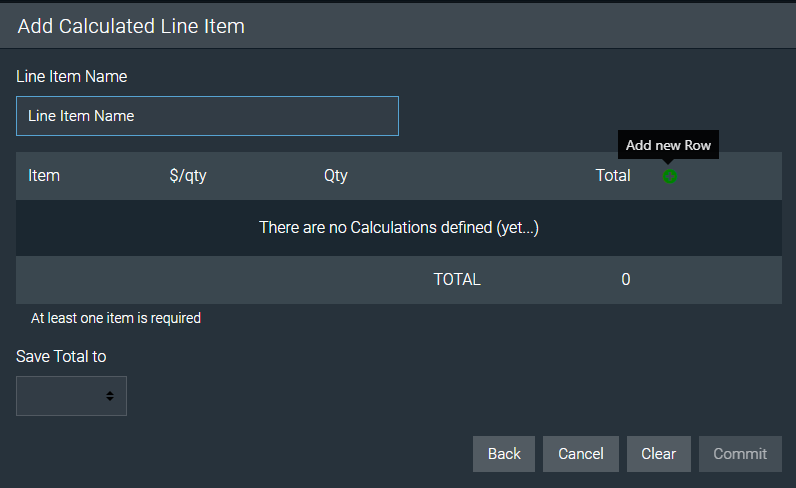
Depending on where the result will be output to, the Calculator will support either dollar amount or hour estimates. In this example, 2 hours per weekly status report over 16 weeks was used in the estimate. While this is a simple Calculation, it’s helpful in order to show the basis of estimate for others to see.
When you are ready to save the result, select the appropriate column to export the result to, and click Commit.

Multiplier Calculator
To add a line with a Selection Calculator, choose Multiplier in the Calculator list, then hit OK:
Once you select the Multiplier Calculator, you will be prompted to enter the Line Item name and select the Work Item you would like to copy from. If you would like to scale the values from the work item you are copying, enter that amount.
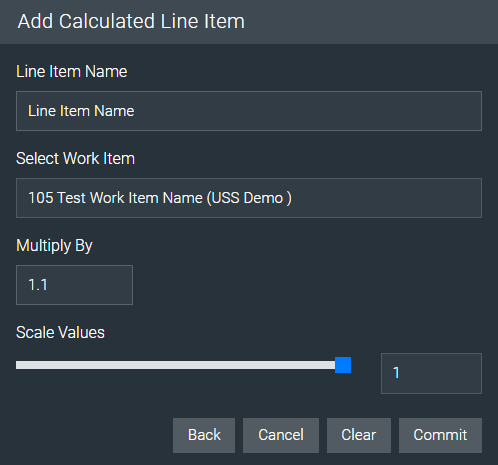
When you are ready, click Commit to execute the multiplier.
General Calculator Interaction
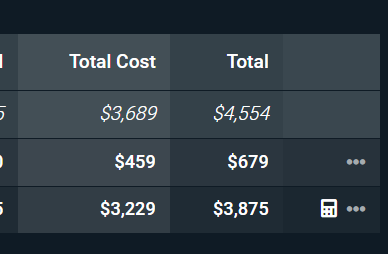
All Line Items that have been created from a Calculator will show the Calculator icon on the far right side of the item.
Modifying an Existing Calculator
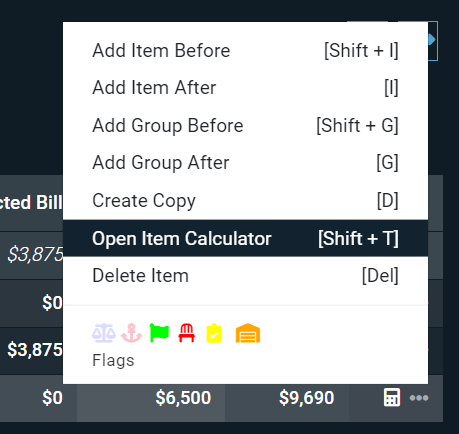
To open a Calculator and make any edits, you can either:
- Use keyboard shortcut Shift + T to open the Calculator for a selected Line Item.
- Clicking the … button at the far right of the Line Item and selecting Open Item Calculator.
In addition to modifying the Calculator’s fields, you can use these buttons:
Remove: Will remove the Calculator icon and the Calculator details without changing any of the Line Item values. This may be useful if you’ve manually made changes so that the Calculator is no longer relevant.
Cancel: Will exit out of the Calculator without saving any changes you have made since the last time the Calculator was committed.
Clear: Will revert any changes to Equations (Manual only), Values (Preset only), and output selections that have been made since the last time the Calculator was committed.
Commit: Will save all updates to the Calculator to the Line Item.
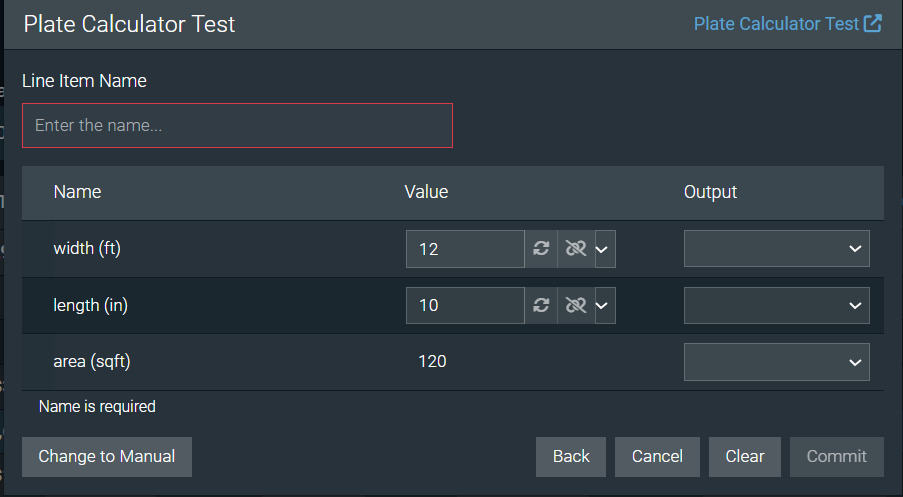
Math in Calculator Inputs
In addition to number values, Calculator inputs also support the entry of math formulas so users can enter math formulas to calculate input values. See the next section for more on math options.
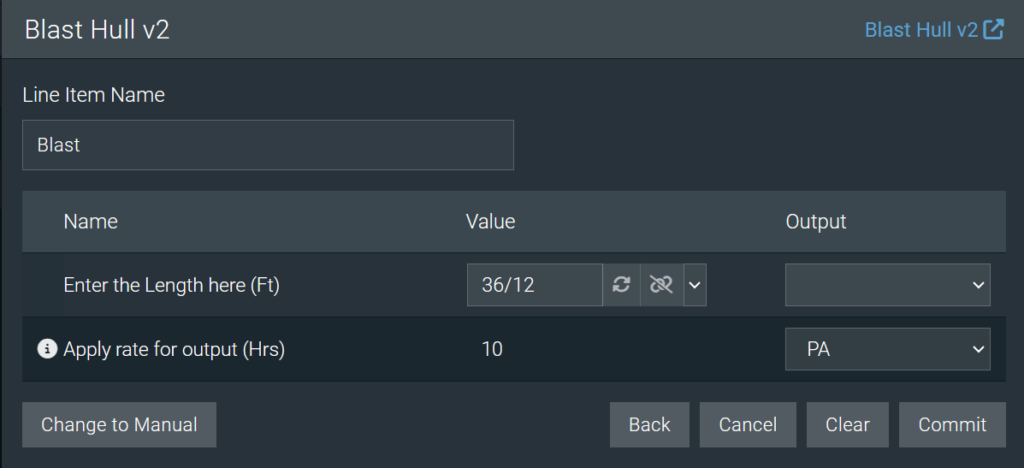
One example where this is useful is for unit conversions within a Calculator. In the below example, the input is expecting the length in feet. If a user only has the value in inches, they can do the calculation in the Calculator input, rather than needing to do the conversion somewhere else.
Copy / Paste
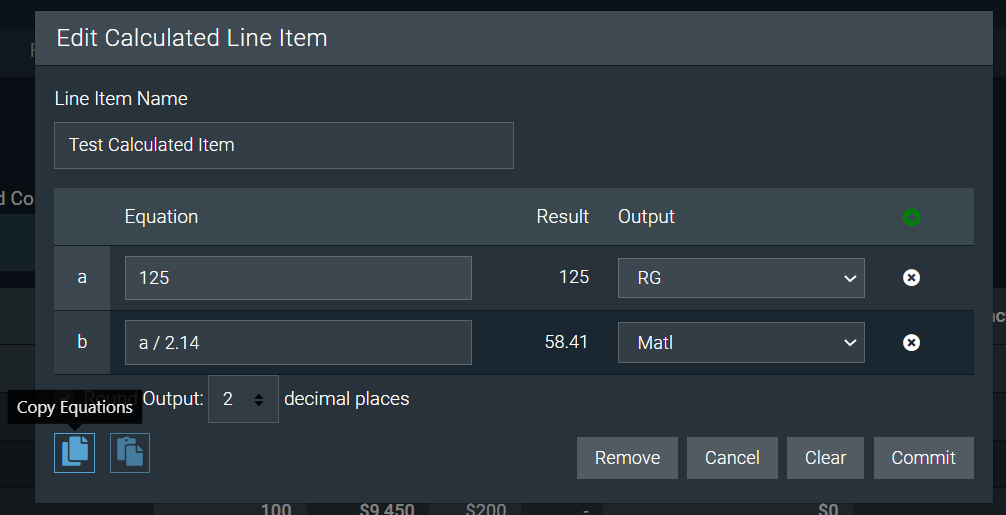
When using Manual OAE Calculators, you can use the Copy Equations button to save the Equations that you have on the current Calculator.
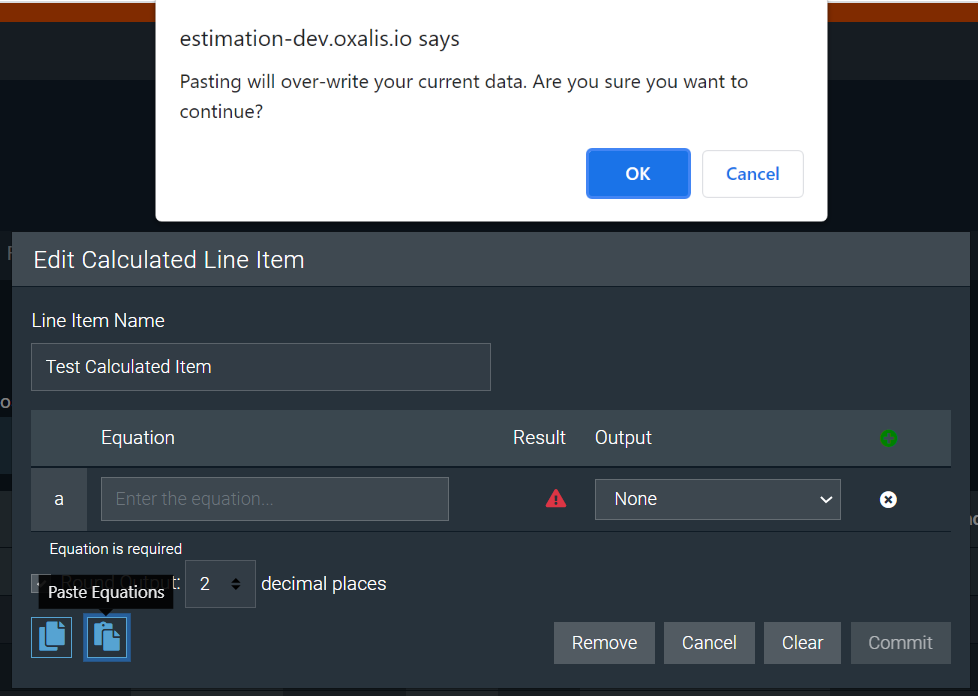
Once you have copied Equations, you can use the Paste Equations button to paste them into a Manual Calculator. Before pasting your Equations, the system will ask confirmation, in case you had already entered in Equation information that would be lost.
Reference for Preset and Manual Calculators
OAE calculators leverage math.js. Operators and Expressions used by math.js can be used in Calculator equations. Scroll down to see common operators and units.
Comments
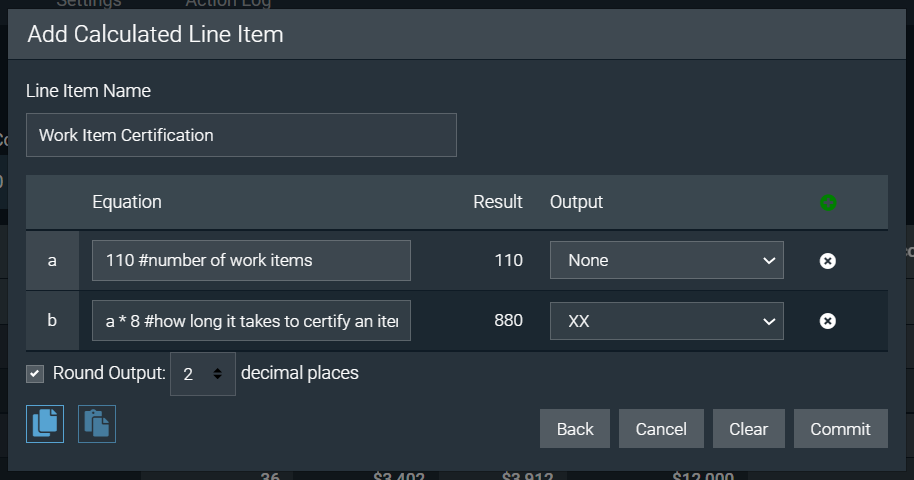
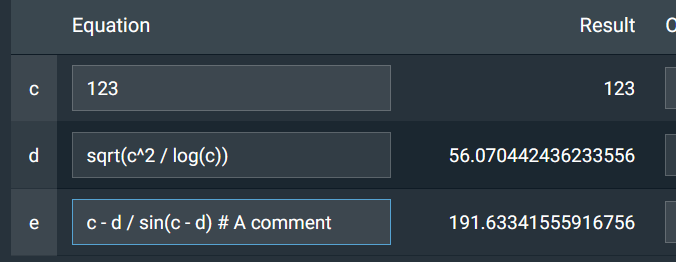
You can add a comment inside an Equation row, by typing # and then the comment text.
In this example, #number of work items and #how long it takes to certify an item are comments.
Unit Conversions
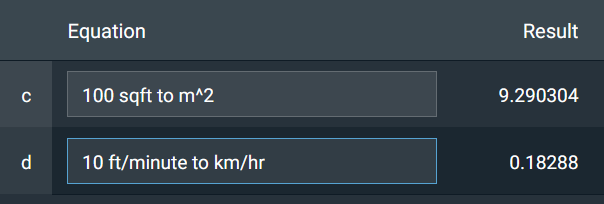
If your Equation requires the use of one unit but your reference blueprint is in a different set of units, OAE Calculators can help do that conversion for you.
To add a conversion, add to after the existing unit, and then the new unit. In this example, we’re converting sqft to m^2 on the first line, and ft/minute to km/hr in the second line.
A detailed set of supported units is listed below.
Complex Equations
While basic math operations will work as expected, math.js gives the system an extremely robust algebra system. Here are some examples:
Operators
You can use all of these operators in your Equations.
| Operator | Name | Example | Result |
|---|---|---|---|
+ | Add | 4 + 5 | 9 |
- | Subtract | 7 - 3 | 4 |
- | Unary minus | -4 | -4 |
* | Multiply | 2 * 3 | 6 |
/ | Divide | 6 / 2 | 3 |
% | Percentage | 8% | 0.08 |
% | Addition with Percentage | 100 + 3% | 103 |
% | Subtraction with Percentage | 100 - 3% | 97 |
% mod | Modulus | 8 % 3 | 2 |
^ | Power | 2 ^ 3 | 8 |
? : | Conditional expression | 15 > 100 ? 1 : -1 | -1 |
to, in | Unit conversion | 2 inch to cm | 5.08 cm |
== | Equal | 2 == 4 - 2 | true |
!= | Unequal | 2 != 3 | true |
< | Smaller | 2 < 3 | true |
> | Larger | 2 > 3 | false |
<= | Smallereq | 4 <= 3 | false |
>= | Largereq | 2 + 4 >= 6 | true |
Units
All units can optionally be written in plural form – e.g. 5 meters.
| Measurement | Unit |
|---|---|
| Length | meter (m), inch (in), foot (ft), yard (yd), mile (mi), link (li), rod (rd), chain (ch), angstrom, mil |
| Surface area | m2, sqin, sqft, sqyd, sqmi, sqrd, sqch, sqmil, acre, hectareSurface area can be specified as length squared – e.g. ft^2 |
| Volume | m3, litre (l, L, lt, liter), cc, cuin, cuft, cuyd, teaspoon, tablespoonVolumes can be specified as length cubed – e.g. ft^3 |
| Liquid volume | minim (min), fluiddram (fldr), fluidounce (floz), gill (gi), cup (cp), pint (pt), quart (qt), gallon (gal), beerbarrel (bbl), oilbarrel (obl), hogshead, drop (gtt) |
| Angles | rad (radian), deg (degree), grad (gradian), cycle, arcsec (arcsecond), arcmin (arcminute) |
| Time | second (s, secs, seconds), minute (mins, minutes), hour (h, hr, hrs, hours), day (days), week (weeks), month (months), year (years), decade (decades), century (centuries), millennium (millennia) |
| Frequency | hertz (Hz) |
| Mass | gram(g), tonne, ton, grain (gr), dram (dr), ounce (oz), poundmass (lbm, lb, lbs), hundredweight (cwt), stick, stone |
| Electric current | ampere (A) |
| Temperature | kelvin (K), celsius (degC), fahrenheit (degF), rankine (degR) |
| Amount of substance | mole (mol) |
| Luminous intensity | candela (cd) |
| Force | newton (N), dyne (dyn), poundforce (lbf), kip |
| Energy | joule (J), erg, Wh, BTU, electronvolt (eV) |
| Power | watt (W), hp |
| Pressure | Pa, psi, atm, torr, bar, mmHg, mmH2O, cmH2O |
| Electricity and magnetism | ampere (A), coulomb (C), watt (W), volt (V), ohm, farad (F), weber (Wb), tesla (T), henry (H), siemens (S), electronvolt (eV) |
| Binary | bits (b), bytes (B) |
Prefixes
Units may also have prefixes:
| Name | Abbreviation | Value |
|---|---|---|
| deci | d | 1e-1 |
| centi | c | 1e-2 |
| milli | m | 1e-3 |
| micro | u | 1e-6 |
| nano | n | 1e-9 |
| pico | p | 1e-12 |
| femto | f | 1e-15 |
| atto | a | 1e-18 |
| zepto | z | 1e-21 |
| yocto | y | 1e-24 |
| Name | Abbreviation | Value |
|---|---|---|
| deca | da | 1e1 |
| hecto | h | 1e2 |
| kilo | k | 1e3 |
| mega | M | 1e6 |
| giga | G | 1e9 |
| tera | T | 1e12 |
| peta | P | 1e15 |
| exa | E | 1e18 |
| zetta | Z | 1e21 |
| yotta | Y | 1e24 |
Learn More
Check out the rest of our User Guides to learn more about OAE:
